White Wash

Tuesday, July 31, 2012

Decorative Window, Dining Area Project, and Weekend Visit with my Fam!

Most of my ideas have come from pinterest, and this is no exception! I saw (as I'm sure you all have seen as well) several decorative indoor windows as wall decorations. Here are some of the photos that gave me ideas:


Here is the window my dad and I made! I love how it turned out.


I decided to use the back side of the window because it had more of a natural, rustic look. The front was a very pretty shade of antique white, but it was stained with red mud, which also aided in my decision to use the back. :) I'm pretty happy with how it turned out!

So to make this, I bought the window at a flea market for $5 and the guy also gave me an old piece of wood that actually came from the same house as the window as well. Oh, and he had some REALLY awesome vintage milk glass vases. I bought all of those! Those are pictured below. My dad cut the wood down to about 4 inches wide, which made the shelf. He cut out the white board (instead of a chalk board like what's pictured above) and the cork board out of some things we had around the house and then caulked it all together. We also decided to add key hooks just for added function.

Here it is hanging on our wall! This is one of the projects Dad completed for us while he was here. I'm very thankful to have such a handy father! :)


Another project that we worked on while my parents were in town was hanging my shadowbox. I really wanted to showcase it somehow, and Adam and I agreed that the best place to do that was in the dining area. The wall in the dining area is actually pretty big, and unfortunately my little shadowbox looked out of place on the wall by itself. It just so happens that I got a going-away gift certificate from my friend Valerie to Pier 1 -- otherwise known as my favorite store in the entire universe! So I picked out some super cute picture frames to go on the wall along with my shadowbox. I think it turned out rather nice, although it was a real pain to hang! Anyway, here's the final product!


Moving on to our visit! We had SO much fun! The night they got here, we decided to go out to eat downtown and we ended up at a restaurant called The Fish Market. It was such a nice environment with live music playing and the food was really tasty! Saturday morning we went to The Birmingham Zoo and it was unbelievable! I really didn't expect it to be so nice. Here are a few pictures of things that we did/saw while there!


 Molly-Kate said "He's a boy!" :)
 Mom is notorious for closing her eyes in pictures. And I have no idea what Dad is doing.


We had  a lot of fun! Afterwards, we had a late lunch at the apartment then played out by the pool! It was an exhaustingly fun day. That evening is when Dad completed all these projects for me. :) Sunday morning we had a late breakfast and then they all went back home to GA. :( They'll come again soon, though! The girls are already crying to come back. (literally! :)

Pin It

Thursday, July 26, 2012

Arts and crafts and a new cookie recipe ...

Tuesday night I got a last minute invite for a "paint and wine night" at my "big's" house. I decided to head over there and I'm so glad I did! I had a lot of fun ... and here's what I ended up painting:

The color scheme doesn't exactly fit very well with the rest of the stuff in our apartment, I know, but Adam was complaining the other day about the lack of color in our place so I decided to do something about it! :)

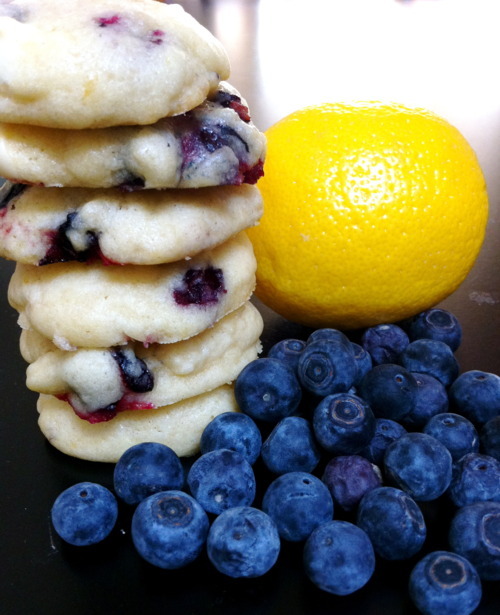
On another note, I made a new cookie recipe ... and you guessed it! It's from pinterest. It's so different from any cookie I've ever made before (of course I'm no cookie connoisseur or anything). They're white chocolate, lemon, blueberry cookies and they are SO good and SO SO soft. If my parents are lucky, there will still be some around when they make it down this weekend. >:) Here's the recipe! It's from a blog by Miss Karli Brae.


Ingredients:
  • 1 cup unsalted butter, softened
  • 1 cup granulated sugar
  • 2 eggs, room temperature
  • 1/2 tsp salt
  • 1/2 tsp baking powder
  • 1/2 tsp baking soda
  • 3 1/4 cups cake flour
  • 1 1/2 cups blueberries
  • Zest of one lemon
  • Juice of one lemon
  • 1/2 tsp cinnamon
  • 2 tsp pure vanilla extract
  • 1 cup white chocolate chips
In the bowl of an electric stand mixer, beat butter and sugar until light and fluffy. Add eggs one at a time, beat after each addition. If using any extracts, add and beat to incorporate. In a separate bowl, whisk together dry ingredients. With the mixer on low, slowly add the dry ingredients into the batter. Carefully fold in any mix-ins. Allow dough to cool in the refrigerator for at least an hour and up to overnight. Use a small scoop (about 1 tbsp size) and place rounded balls of dough on a cookie sheet lined with parchment paper or foil. Bake for 11-14 minutes at 350, until the bottoms are slightly golden brown (the edges should not brown). 

*Note, when the batter is finished, it looks and feels like it's going to be a crunchy cookie, but it's not. They are so soft!

Pin It

Tuesday, July 24, 2012

Week Two in Birmingham!

This week I've been cleaning the apartment, reorganizing a few things (although Adam has done a great job keeping the apartment clean, it definitely needed a woman's touch) and getting ready for my parents to come visit! I'll post about that later. What I should be doing is studying for my medical terminology test that I'll be having as soon as school starts ... in just a few short weeks. Yikes.


This past weekend Adam and I really wanted to get the pups out of the house so we decided to take them on a walk through one of the MANY parks in Birmingham. We ended up first at Vulcan Park on the trail. 
We talked with some bicyclists and found out that there was actually nothing at the end of the trail, and it was SO hot ... even the girls were dragging behind by the time we decided to leave ... so we decided to find a different park in Highland where we could just sit on a blanket under some big trees. This is the part of town Adam and I originally wanted to live in. It's SO cute. Definitely a city feel, but there are parks everywhere, and it's really close to so many things. It's a really fun area. So after we parked and started walking, we heard live music coming from Rushton Park, which just happened to have been where were were headed anyway. As it turns out, multiple DJs were coming together to play at the park and just provide fun music for everyone that wanted to attend. 
We sat and listened to that for a while, and then walked across the street to Rojo for an early dinner. We sat outside on the patio with the dogs. Lucy got many compliments. :)
~~~
Another project that I've been working on is a wedding website book. Adam and I purchased the website adamandkatieswedding.com for the year leading up to the wedding (which is where I blogged about the trials and tribulations of wedding planning!) but it has since expired and now another couple (another Adam and Katie) have purchased the domain name. However, I would HATE to lose the super cute and fun stories Adam and I wrote on there, so I decided to make a book of all the stories so I could have and keep them forever! If you'd like to see the book so far, click on the link below. You'll need to create a Mixbook account, but believe me, it's worth it! That website is so much fun.


http://www.mixbook.com/photo-books/nature/spring-7698937 


I've added all of the stories we wrote, but I'm half contemplating adding all of the blog entries that we wrote as well. I'll have to see about that .... 


I just found out that there's actually a website that does this for you, but that isn't an option for me since we don't own the domain name anymore. Nonetheless, here's that site for all you bloggers who would like to print your own blog. Pretty neat!


http://blog2print.sharedbook.com/blogworld/printmyblog/cutestblog/index.html


That's all for now!


Pin It

Sunday, July 22, 2012

I needed this today ...

My friend and cousin, Brittany Fouche, posted this a few weeks ago on facebook, and I knew it would come in handy for me at some point. I've really needed to improve my prayers and conversations with God. They've felt so meaningless lately. Hopefully this will help. Oh, and church this morning.


Pin It

Friday, July 20, 2012

Crispy Cheddar Chicken

So Adam and I tried a new recipe last night called Crispy Cheddar Chicken. It was delicious! Of course I found the recipe on pinterest :) but it was pinned from a blog called Jamie Cooks It Up! It's very easy ... I'll post the recipe. The only amendments we made were adding salt and pepper to the sauce. Oh, and we didn't use any parsley. I added a few notes to the recipe. They're inside the parentheses. 

*Note -- this recipe and these photos are taken from Jamie Cooks It Up! -- These are not my own.

Time: 15 minute prep + 35 minutes baking
Yield: 7 servings

For the chicken:
4 large chicken breasts
2 sleeves Ritz crackers (1 sleeve was enough)
1/4 t salt
1/8 t pepper (we didn't really measure how much salt and pepper we added)
1/2 C milk
3 C cheddar cheese, grated
1 t dried parsley (we didn't use any parsley)

For the sauce:
1   10 ounce can cream of chicken soup
2 T sour cream
2 T butter (and we added salt and pepper)


Directions:
1. Cut each chicken breast into 3 large chunks. 


2. In a small food processor grind up the ritz crackers.  (I just crushed them up in a bag)
3. Pour the milk, cheese and cracker crumbs into 3 separate small pans. Toss the 1/4 t salt and 1/8 t pepper into the cracker crumbs and stir the mixture around to combine.


4. Dip each piece of chicken into the milk...
then the cheese. Press the cheese into the chicken with your fingers. Some of it will fall off when you add it to the cracker crumbs, don't worry about it.


Press the cheesy chicken into the cracker crumbs and press it in. By the time you are coating the last piece of chicken, the dish you are using for the crumbs will be full of cheese. Don't let it get you down. Once the cheese melts in the oven it will adhere nicely to the crumbs and the crackers.


5. Spray a 9x13 pan with cooking spray and lay the chicken inside the pan. 


6. Sprinkle the dried parsley over the chicken. 
7. Cover the pan with tin foil and bake at 400 degrees for 35 minutes. Remove the tin foil, bake for an additional 10 minutes, or until the edges of the chicken are golden brown and crispy. (This was actually the PERFECT amount of time for the chicken to cook. It was literally ... well, perfect.)
8. Into a medium sized sauce pan combine the cream of chicken soup, sour cream and butter with a whisk. Stir it over medium high heat until the sauce is nice and hot. Serve over the chicken. 

Enjoy!


Pin It

Wednesday, July 18, 2012

New 'do!

I got my hair cut! Almost seven inches! I did it literally two days before I left for Bham so very few people actually got to see me with my new 'do before I left. That's my reason for blogging about it here. I didn't post anything to facebook ... I'm not sure why. I guess I just didn't feel like it, but I do LOVE my hair! Adam doesn't LOVE it like I do, but that's ok. Maybe it'll grow on him (I hope). He doesn't like that it's longer in the front than the back, but it's a bob, and that's what bobs are supposed to do. I didn't tell hardly anyone that I was doing it. I wouldn't call it impulsive, but it didn't take me long to make the decision. I wanted something cute, easy and professional, but most importantly I wanted an actual hairdo. I just felt like my long hair was becoming drab and dull looking on me. So I spiced it up. Joseph Nunn at Salon Lux in Athens did a phenomenal job! He is so talented and I love him so much. I swear it, if I ever become rich and famous that man will be mine! Well, he'll be my personal hair dresser anyway. :)


Pin It

Tuesday, July 17, 2012

Morning Adventures...

This morning I woke up to a nice surprise ... ants decided they wanted to take over my car. Believe you me, it was the last decision they ever made. Nonetheless, it was still a mess to deal with. Before I even ate breakfast (and usually breakfast is the FIRST thing I have to do!) I drove to the gas station to vacuum out my car, went to WalMart to buy ant poison and I then killed those little monsters! I felt really embarrassed though, because I thought it somehow meant I kept an unclean car, but I knew my car wasn't THAT bad. After talking to my dad, he confirmed that it wasn't that ... apparently I just parked near an ant bed and they thought it would be fun take over my car. Like I said, it was the last decision they ever made.

On another note, this pisses me off!!!


I had my toes done this past Friday, which was FOUR days ago! I took this picture last night, so at that point my polish was only three days old! And what's worse, I haven't worn tennis shoes, socks, or any kind of closed toes shoe at all since I had it done. I am not a happy girl. Lesson to be learned: always stick to OPI. I decided to use China Glaze because I really liked the turquoise color, but it was a mistake. UGH. Girls, let my story be a lesson for you, too!


Pin It

Monday, July 16, 2012

Keeping Busy!

Once again I find myself blogging to keep my friends and family updated on my life ... except last time it was all about our wedding! I really hope I'll be able to keep this blog up after I start school. I guess only time will tell at that point!

For now, I'm having to find activities to keep myself busy before school starts. There are several projects I have lined up that I REALLY hope to have finished before August 15th. I'll make a list here with the intention of updating the blog each time I actually complete a project on the list. So here goes!

One project that I've already finished is the shadowbox that I made for our wedding. I did a lot of research on google to get ideas on what I wanted my shadowbox to look like. Here were some of my inspirational images:


I also used images from this website as well. And here is the finished project! It includes a photo of us seeing each other for the first time in full wedding attire, an invitation to the wedding, a program, the ring bearer pillow, the crystals from my bouquet, two fans which were guest favors, the pocket squares from my dad and Adam, my hankerchief, a direction card from the reception at The Carl House to the after party at the hotel, my garder, the flower I wore in my hair at the reception, and a color swatch from my bridesmaids' dresses.


Pin It